


Brady_The
-
Posts
737 -
Joined
-
Last visited
-
Days Won
7
Content Type
Profiles
Forums
Blogs
News
Store
Everything posted by Brady_The
-
If I remember correctly bowls and pots should be emptied when thrown into water.
-
 Don't mind me, I am just an AI hallucinating things. The ModMaker doesn't do that, but it generates the same file names. So if people use the ModMaker and put patches into the game domain (because that's what you do if you refuse to go through the wiki tutorials to understand the finer details of modding VS) you'll get those results. Hm, I wonder if those domain issues are mentioned anywhere on the wiki. I might have to take a look.
- 8 replies
-
- 1
-

-
- compatibilty
- mod
- (and 1 more)
-
how did I turn on this weird block overlay?
Brady_The replied to Whimsical Fool's topic in Questions
I do believe that this is the build outline for the cementation furnace. You activate it by Shift + Right Click and deactivate it by Right Clicking the stone coffin. -
Well, that solution was surprisingly (and might I add disappointingly) easy. This is btw an interesting side effect of the ModMaker. I can only assume that we will see more of this in the future.
-
I quite like the trim, but now that you mentioned and after another look, removing the canopy or replacing the dark with a lighter wood might already be enough of a change. As it currently stands the (porch) roof acts as a thick, dark border, minimising the size of the ground floor and making the whole issue worse by darkening the whole lower section.
-
I think the house looks pretty great. The first floor is a bit oppressive in size, overpowering the ground floor with its volume. Make the ground floor a bit taller and see how it changes the view.
-
Unfortunately you cannot at this time.
-
Alter Drifter drops
Brady_The replied to Micah Holmes's topic in Mod Development Questions/Troubleshooting
Alright, now we are getting somewhere. Where is the patch file located? It should be in "craftsmanship\assets\craftsmanship\patches". Sub-folders in the patches folder are okay. Also, test it without any extra mods to make sure that it is not some other mod messing with the drifter file. -
Alter Drifter drops
Brady_The replied to Micah Holmes's topic in Mod Development Questions/Troubleshooting
Make sure that you are using the correct asset type and code, and that the asset is available. -
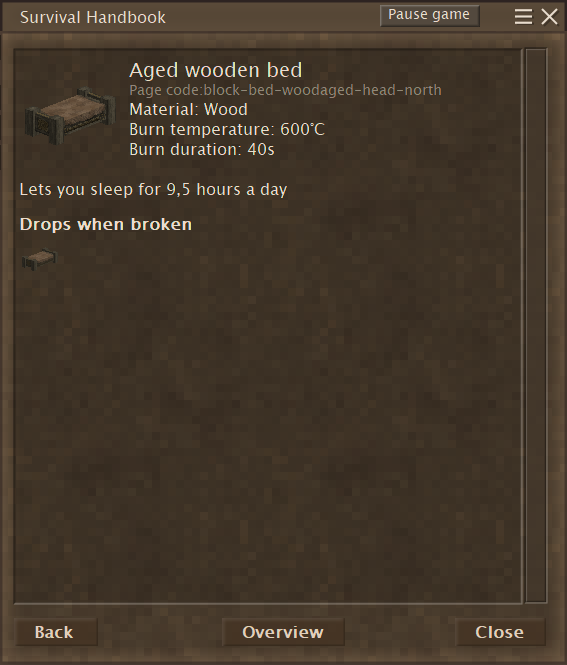
What's most likely missing in your case is the correct command. "/giveitem" is for items. Blocks require the command "/giveblock". The next hurdle would be the correct asset code. The easiest way to obtain those would be via Creative Inventory. However, if you don't have any admin powers, the next best way would be to execute the command ".edi" in chat. This adds among other things, the page code of assets to their handbook pages. This gives you two information. Is it a block or an item. What is the asset code. With those you can now spawn the aged wooden bed (or any other asset). /giveblock bed-woodaged-head-north, followed by the quantity if you need more than one and the target, if you are not giving the bed to yourself. "/help" giveblock" in the ingame chat will help you with any optional parameters.
-
Alter Drifter drops
Brady_The replied to Micah Holmes's topic in Mod Development Questions/Troubleshooting
That looks correct. How did you ascertain that the drop is not working? -
Alter Drifter drops
Brady_The replied to Micah Holmes's topic in Mod Development Questions/Troubleshooting
Drops are a bit different for entities. Those are handled on the server side. So you would have to address "/server/behaviors/9/dropsByType/*-normal/-" if, for example you would want to add drops to the normal drifter. Because you are patching a game file you don't need to add the game domain in front of asset codes. -
Alter Drifter drops
Brady_The replied to Micah Holmes's topic in Mod Development Questions/Troubleshooting
You could do it in such a manner, however, it would have a huge downside. If you place the drifter file in "yourmod/assets/game/entities/lore" you would overwrite the Vanilla drifter. If the developers should ever decide to change the drifter, players using your mod would never experience those changes because the original file is overwritten. This could also cause problems with other mods modifying the drifter file. You want to patch the original file instead: https://wiki.vintagestory.at/index.php/Modding:JSON_Patching This way the original file is not replaced, but modified only in the areas you chose to address. You could utilise the ModMaker, which you can find in the installation directory, to create patches for you based on edited Vanilla files. -
According to the comments this mod doesn't work any more. I wouldn't count on an update any time soon: https://mods.vintagestory.at/reignited#cmt-22612
- 1 reply
-
- 1
-

-
The scrambled eggs recipe works for me. Start a completely mod-free test world, switch to creative and test again. "/giveblock firepit-cold" lets you skip the firepit building part. If it works there, you have conformation that a non-cooking mod is apparently messing with cooking.
-
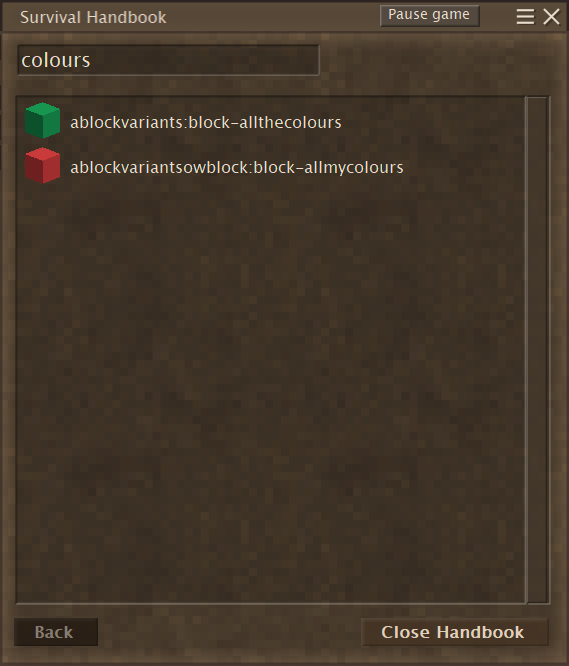
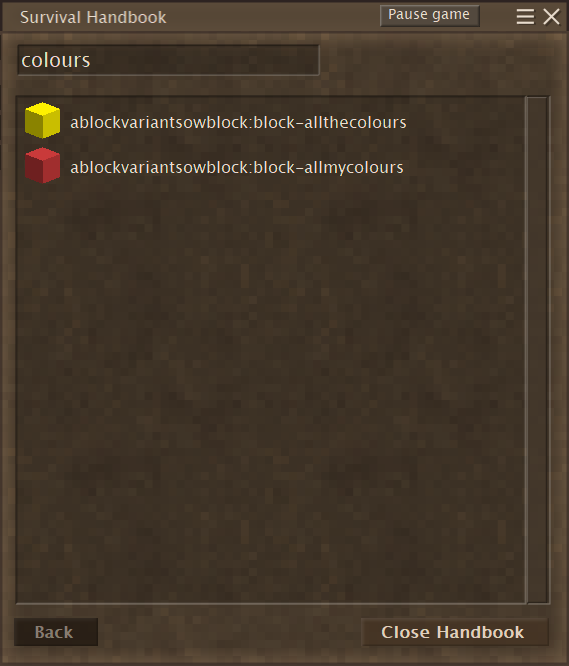
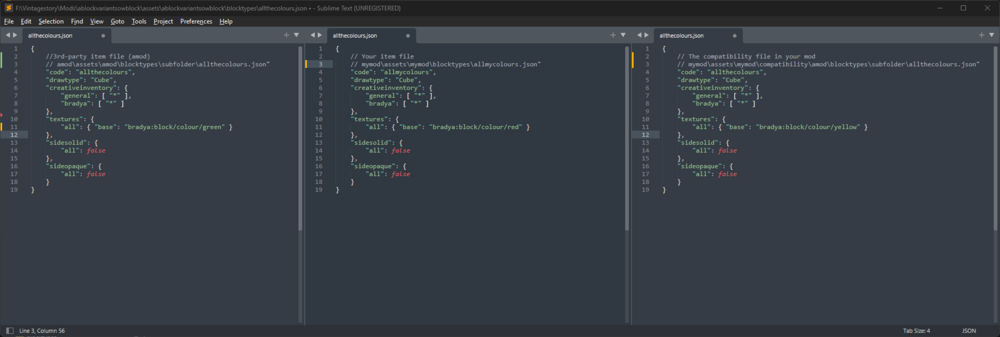
That's Compatibility Lib's moment to shine. I am currently rewriting the article, because it is a bit archaic. Here's a sneak preview: https://wiki.vintagestory.at/BradyThe/Sandbox (It's still a work in progress, but hopefully explains the inner workings of the Comp Lib already a bit better.) How I would go about it depends a bit on the structure of the other mod and your goals. Remove recipes from the other mod: Easy. I would probably use Mod-dependent json-patches (JSON Patches in my rewrite) to disable them. Combine/replace item: Easy - medium: There are one or two solutions to this. Overwrite the 3rd-party item with the Comp Lib. Put all properties of both items (the 3rd-party and yours - combine) into this file. Disable your item via patch. Add recipes into the compatibility folder using the item code of the overwrite. Disable the 3rd-party item with a patch, add any properties of the 3rd-party item you want in yours (combine) to your item by patch. Example setup (I quickly frankensteined an existing test setup, pay no regard to any domain or other inconsistencies): I hope all of this isn't too theoretical only making sense in my mind. If you have any questions, shoot them.
-
Opening clothing models?
Brady_The replied to Micah Holmes's topic in Mod Development Questions/Troubleshooting
You select the backDropShape that has been used in the shape and potentially look into the clothing itemtypes to see what the dev did to the clothing in the background. Edit: I assume the shape you looked at step parented parts of the shapes to the backdrop shape so that the clothing item shows up properly on the player/npcs. Without backdrop present those parts might reset to a default position at 0,0. -
As I expected there's nothing obvious popping up in the logs. Besides the usual lot of warnings and errors due to outdated or broken mods. I would reinstall the game. I see a lot of audio errors. It is very possible that this will fix not the recipe issues, though. If that's the case, employ the binary search meethod I mentioned above to find the culprit.
-
I don't think that it will cause any real damage, but I would still look through my mods and find out which one is causing it, to notify the author about this error.
-
Handbook Game Mech
Brady_The replied to Micah Holmes's topic in Mod Development Questions/Troubleshooting
Oh. To be fair, I haven't done any handbook texts yet, so I only orientated myself on other mod. I should have taken a look at the wiki page... Anyway, you can do it both ways. I don't think that there are any advantages or disadvantages to either of them. You just have to settle for one. { "pageCode": "brady-test", "title": "brady-test-title", "text": "bradya:brady-test-text" } { "game:brady-test-title": "Test title", "brady-test-text": "Test text" } -
It's possibly a mod with a broken recipe file. Some errors can break seemingly random recipes. The link to your mod list doesn't work. Something else could be going on, though. If you want you can share your client-main and server-main log files here. However, those do not necessarily point towards the source of the error. I would suggest to perform a binary search to find the culprit.
-
Handbook Game Mech
Brady_The replied to Micah Holmes's topic in Mod Development Questions/Troubleshooting
The domains shouldn't be needed here. game:mechanici... -
Snowy Versions of Custom Slabs Break
Brady_The replied to jun1per's topic in Mod Development Questions/Troubleshooting
Are you sure you are looking at an up variation of your scrap slab and not a down variation? Hit Ctrl+F3 and look at the block in question. The block info alone is not too precise. For some reason the game will only display one iteration of the block as the asset code, which is not necessarily the correct one. up-snow variations are not created because their top is at the height of a full block. Snow will cumulate on top naturally. The down and cardinal direction versions are special cases, because they are lower or smaller than normal blocks, which would result in strange results, floating snow and the like. Anyway, if you added a scrap texture for the plankslab correctly (/texture/block/wood/planks/scrap.png) you shouldn't get any errors. What do the logs tell you? Texture issues should pop up in client-main, but it's always good to keep an eye on server-main as well.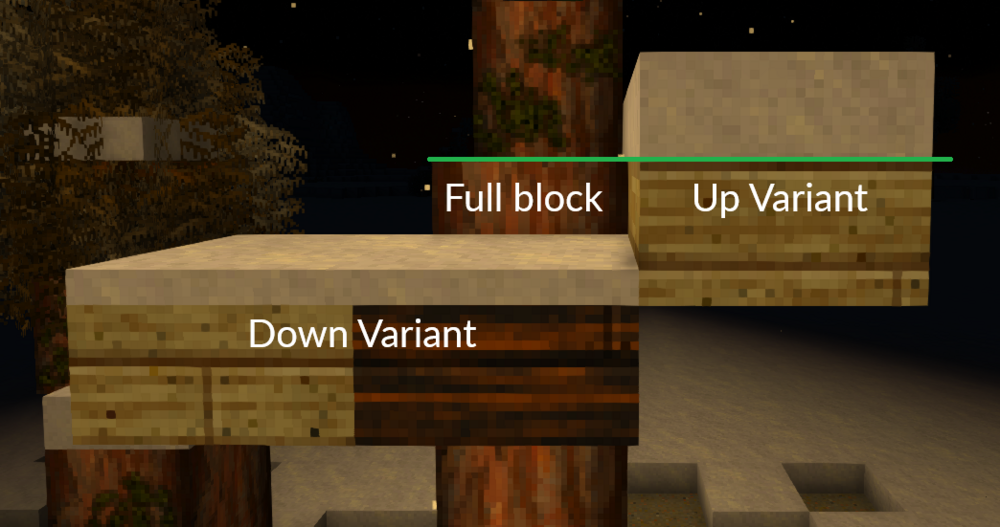
-
Hey Eranderil, welcome to the forum! The game is utilising command blocks for the eidolon fight. https://cdn.imgchest.com/files/e0714a145670.jpg I'd load into a testing world, go into Creative mode, head to the Resonance Archive and have a look for myself. Shift+Right Click should open the Edit interface. Here are some more information: https://wiki.vintagestory.at/Command_block I haven't used those before, so I cannot tell you if that is all you need. It's still a decent place to start, I'd say.
-
clientsettings.json in %AppData%\VintagestoryData


